Sunday, 15 April 2012

ANZAC Biscuits

ANZAC Biscuits - for my kiwi mommy


My mom made a baking request this weekend and, seeing as she is my most devoted blog follower, my most blindly-positive and over-encouraging taste tester, and my biggest, most committed fan, I couldn't really say no. 


So I was handed the New Zealand baking bible, a book so staple to a kiwi kitchen it is has been iconized in art and commemorated through history. 


Seriously, check it out. It's a big deal. 


And we've had this copy in our kitchen for as long as I can remember, and likely before then too. 


When I was a kid my mom said she would help me make anything from this cookbook that I wanted and, from a wide and comprehensive selection of succulents deserts to savoury meals, I chose mayonnaise. 


Don't ask my why. I was such a strange kid. And it ended up tasting horrible.


I was crushed. 


Anyway, this time I was directed to something much less peculiar. The cookies mom wanted are even more of a definition of Kiwi culture (arguably) than Edmond's cookbook: ANZAC Biscuits.


These cookies are Basic, with a capital B. They were created in 1915 for the purpose of sending to NZ and Aussie soldiers oversees. 


They contain no eggs or milk so they last forever and they are made with only a handful of ingredients, which made them ideal for the wartime ration periods. 


Since then a lot has changed, but these cookies have not! The recipe literally is the same thing. 


Simple, simple, simple.


If you haven't noticed, that isn't really my baking style!


No layers, no caramel, no sweet surprise hiding in the centre of this treat. But I wanted to make my mom happy so I set to work and, as expected, it wasn't really that much fun! 


Except for this part - the making a well in the flour/oats/coconut and pouring the butter in. 


Yup, that was kind of fun. 


But the good thing about these boring cookies is that there isn't anything that can go wrong. which is really good for me, because I have a tendency to make burn things, misread instructions, forget key steps, and forget the recipe and just do it freestyle.


Not the case with these cookies. I could not have forgotten something if I had tried to.


The result: the cookie ended up tasting just as my mom had hoped. 


Allllllriiiiight, so it was worth it. 


I would also like to point out that the recipe calls for rolled oats. My pony club knowledge tells me that what I put in was crushed oats. 


Do supermarkets even sell rolled oats?


Definitely war time stuff. 


And horse food. 


ANZAC Biscuit Recipe 
(a variation of the one from Edmund's)


1 cup flour
3/4 cup sugar
1 cup "rolled" oat
1 cup desiccated coconut
5 tablespoons butter
1 tablespoon Corn Syrup
1/2 teaspoon Baking Soda


Mix together flour, sugar, oats and coconut. 
Melt butter and corn syrup. 
Dissolved Baking Soda in 2 tablespoons of boiling water and add the melted butter and corn syrup. 
Make a well in the middle of the dry ingredients and add wet ingredients. Fold together and then spoon out onto a greased tray. 


Bake for 15 - 20 minutes at 350 F. 


And the day ends with a tin full of these classic biscuits and a happy mama. 


Not too bad. 


Saturday, 14 April 2012

Caramel Brownies

Caramel Brownies - oozing goodness, for goodness sake.  


So, I get brownies now. 


It was a revelation. Somewhere between the melting chocolate and the creation of decadent caramel, it dawned on me, a brilliant flash of understanding: brownies are awesome and, as long as I don't think about it too much, they're really easy too.  


And I can prove it. 


After my mega mess up last night when I literally tossed the brownie pan into the air and ended up with a major mess, my perfectionist self was nagging me to try it again. I wanted mouth watering squares that I could feed to my friends, not crumbs that I was able to squish into a medium tuperware (which has now become one big, oversized brownie cube). 


But, I didn't want to do the same recipe two days in a row *yawn*. Nope, time for something different. 


Something better. 


In comes a lovely book called Fabulous Brownies that I bought last summer for some much needed brownie inspiration. 


When I bought it last year, I successfully left out a cup of sugar in my first batch of inspired brownies and then overcooked my second batch. It was not so fabulous.


But I dusted off that book this morning  and determinedly chose the most delicious looking brownies I could.


I made a variation of the salted caramel swirl brownies, because following the recipe would simply be too easy, but also to fit the taste of my sister (most notably, no nuts!). 


The result, as you can see, was nothing short of amazing. And I am not even exaggerating. The homemade caramel is seeping out and the brownie itself is perfectly moist, perhaps even a slightly bit undercooked, which is how all brownies should be. 


Caramel Brownies
6 oz Bittersweet chocolate
2 oz Unsweetened chocolate


I am not really sure how much a difference there is between using those two chocolates, but I ran out of bittersweet chocolate and so topped it up with the unsweetened kind!


3/4 cups butter
1 cup sugar
4 eggs
1 teaspoon vanilla extract
1 cup flour
a pinch of salt 


Caramel swirl
1/4 cup sugar
1/4 cup brown sugar
2 tablespoons butter
1/3 cup whipping cream
1/2 teaspoon sea salt flakes


I have never made caramel before and so I was pretty excited to see it in the recipe. It's kind of like a chemistry lesson! I didn't know what to expect but I was ready to do some experimenting. 


First things first, put on your lab coat. 


Then add 2 tablespoons of water and the sugar into a sauce pan. On low heat, wait until the sugar is all dissolved.


 Once it is dissolved, boil the mixture and wait until it turns an amber colour. This is the science part! It took longer than I expected for the boiling sugar syrup to turn amber. But it started to happen, slowly, and I decided to just be patient, usually a good call.


Now, there is my amber colour! It's a lot thicker now too. I prepared my secondary ingredients in a bowl so that I could easily add them when it was time, which is now. Take your mixture off of the element and add your brown sugar, butter and cream. 


Once they are thoroughly mixed in, put the mixture back on the heat and boil it for about 5 minutes. It should start to thicken slightly and you'll know it's ready when it leaves a layer on the back of your spoon. When it's done, take it off the heat and start making your brownies. 


Like always, melt the chocolate and butter in a heat proof bowl over boiling water. Let it cool slightly after melting and then add it to the sugar, eggs and vanilla. This needs to be done slowly! Pour in some of the hot chocolate and whisk briskly. Adding only a bit in at first allows the eggs to adjust the heat properly. Next fold in your flour salt, then stir until mixed properly.


First you are a scientist, now an artist! 


Pour half of the batter into a prepared pan. Mine is 7x7 but that's only because it's all I've got. This would likely be better in a bigger pan, like an 9x9 inch. 


Next, be creative, and blot/draw/doodle/plop half of the caramel mixture on top. Don't forget the corner pieces, they like caramel too. 


Repeat. Brownie batter. caramel.


Here is where the true creativity shows - making the swirl! Drag a knife over the top of the brownie batter, hiding the caramel here, showing it there... creating temptation! 


then 25-30 minutes later, after cooking at 325F, they will look like this. Swirl is so worthwhile. 


Even this handsome man thinks so. 


Oh, yes. He does. 


They're down too. 


And you can just imagine how happy this guy would be if he got a plate of these brownies. 


Look at more funny looking dogs here. 


Or continue drooling over caramel brownies. 


Fudge Brownies

Late Night Fudge Brownies - please, no excuses needed


It was the 3rd episode of the Real Housewives of Vancouver this week. The content is irrelevant, other than the fact that it's consistently catty, overly-indulgent and, to be honest, embarrassingly addictive. 


That's it. Embarrassing. 


You ask anyone in this city if they watch the show and you'll get three responses:


1. The High and Mighty: the obviously-not, that-show-is-so-trashy, I-can't-believe-that-you-think-I-do. 


(Oh puuuh-leeze) 


2. The Unabashed Viewer: we get it, you know someone on the show. Or, better yet, you and/or your mom is on the show. 


3. The Self-Concious Watcher: the most common reaction I have come across and it goes something like this...


"Yeah, I watch it. I, mean, I have to - it's in Vancouver! It's cool to see them in my city, you know? It's total trash, of course, and I usually never watch shows like this..." etc


So much embarrassment.... enough with the excuses! 


Just watch the show and enjoy the trash, the gossip, and have a sense of humility as you laugh at both yourself, and the people on the show. 


Live a little! 


And have a brownie. 


Yes, have a chocolate packed treat. It'll do you good. 


And most importantly - no need to make an excuse for doing so! No extra gym time later, no brownie just because you've eaten so well today. 


Just eat the damn brownie. 


Preferably while watching the Real Housewives of Vancouver, or something else which makes you feel good about your relatively functional life and refreshingly down-to-earth values. 


I got my little sister to help me make these brownies. They were incredibly easy - especially for me because I got to watch while she did all the work! QUITE convenient. 


That being said, I have never really "gotten brownies", which is ironic because they are apparently the easiest thing to make, ever. 


Add melted chocolate to dry ingredients.


Put it all in a pan.


Pan in the oven. 


Done. 


....Point made. 


That being said, we came into some challenges! We tossed on chocolate sprinkles, just because, but they burned a bit in the oven. Luckily, we could just scrape them off after. I will just have to save those for cupcakes. 


Speaking of embarrassing... disaster happened. I DROPPED the pan, right out of the oven. Look at this scrambled mess! I actually could not believe what I'd done. 


But no excuses.


It had been done.


And it was going to taste delicious no matter how it looked, I was determined.


That being said, I managed to cut a few semi-square pieces out of that mess. 


Broken to bits, but still looking yummy! 


The best part was when my sister got to taste test them - a baker's duty, of course, and she took it on honourably.


Fudge Brownie Recipe

5 ounces unsweetened chocolate
6 tablespoons unsalted butter
2/3 cup of sugar
3/4 teaspoon of vanilla
1/4 teaspoon of salt
2 large eggs
1/2 cup of all-purpose flour
1/2 cup semisweet chocolate chips

Combine chocolate, butter, sugar, vanilla and salt in a sauce pan. Cook at low heat. You could very nearly leave this to do it's thing by itself until everything is melted down, but you should probably stir it a bit to make yourself feel useful. 


Remove the pan from heat and wait to cool.

Add eggs, beating in each egg individually. 

Add flour and chocolate chips (we opted for a veryyy generous amount of those, good choice) and fold them into the wet ingredients. 

Pour into a buttered and lightly floured pan (we used a 7x7, for thicker brownies) and cook at 350 F. They should take 25-30 minutes. 

Then, ideally, avoid dropping the brownies. Unless you like crumbs. Lots of them. 

Finally... devour!


Thursday, 12 April 2012

Peanut Butter Oreo Ice Cream Cake

Peanut Butter Oreo Ice Cream Cake - for anyone who needs a cheering up


This cake came up on my Facebook feed. 


 ...challenge accepted! How could someone not want to make this? Better yet, how could someone not want to eat this? Only crazy people would say no.


And no one asked them anyway. 


For those are aren't immediately clawing at the screen in an attempt to transport to a world where you and this cake become one... let me explain. 


Oreo's. A whole 9inch springboard cake dish pan full of them. 


Peanut Butter + Ice Cream... Is this really not obvious to anyone right now?


Chocolate Fudge Sauce. 


More Oreos.


Even better yet, this is an ice cream cake made without an ice cream machine, which means anyone can make it. and that is awesome. 


I found the recipe really simple to follow and I only changed three things:


1. I substituted store bought fudge for home made fudge. You can find the recipe here. 


Here is a photo of some of it on the ice cream cake:


Here is a photo of a lot of it on the ice cream cake:


Much better. 

2. I felt a little sorry for the peanut butter in this recipe. Don't you think the Oreos are a little over-represented? The ice cream itself is peanut butter flavoured but it's the Oreos that get all the glory being on the top of this cake... Not fair. So I added some Reese's Cups on top too. It seemed only right. 

And, also, because at the grocery store the lady said I was $2 away from getting $10 off of my groceries. The Reese's were the candy bar closest to me. 

I think they were calling to be put on the cake. and my subconscious answered. 


Even more much better. 

3. The original site makes the cake in a pie dish but I went for the fabulous springboard dish above. I also may have nearly doubled the amount of Oreo's in order to really build up the crust. All the way to nearly the top of the dish. 


Naturally, more butter was needed. Never a bad thing. 

I left the cake in the springboard pan and put it in the freezer until I got the chance to see my hungry friends. Seriously, I was not ready to take this out until it could be properly enjoyed!


Fast forward to today: 
Canucks first game of the play offs. It didn't exactly go the way we hoped.  

So I had some sad friends. A cake of epic cheering-up proportions was definitely needed.


How convenient, I have one in my freezer. 

Out comes the cake, in all it's amazing glory. 

Let's admire. 


Only this small section of Oreo wall was too short to encompass all of the wonderful, over-flowing ice cream. But it's kind of my favourite part. 


Apparently it's his too! 


There's the chocolate fudge layer seeping through! Wishing now that I had put even more on! It perfectly oozed out as the cake warmed up after being at room temperature. 

I like this chocolate fudge sauce, can you tell? 


I said from the very beginning that I love baking because it brings a smile to people's faces and this cake was no exception... so many happy faces! 

And, since it's important to always appear to be a more knowledgeable and capable baker than one actually is, this cake earned me some major kitchen cred. 

Seriously, an ice cream cake blows people away. 


"You actually made this??"

Why yes, I did, and so can you! It's so shockingly simple.

But you should probably tell people that you have to be a super knowledgeable and capable baker to do it. 

Recipe:

1 box Oreo Cookies
6 tbsp melted butter
2 cups cold heavy cream
1 (14 oz) Sweetened Condensed Milk
1/2 cup peanut butter
1/2 teaspoon vanilla extract
1 bottle Smucker’s Chocolate Fudge Microwave Topping
Finely crush about 25 Oreos in a food processor. Mix with melted butter and spread in the bottom of a 9″ round pan for the crust. Freeze for about 10 mins. Meanwhile, lightly crush the remaining Oreos into large pieces. Whisk sweetened condensed milk, peanut butter, and vanilla in large bowl and set aside. Whip the heavy cream to stiff peaks, then fold the whipped cream into the sweetened condensed milk mixture. Pour half of the peanut butter ice cream mixture on top of the frozen Oreo crust. Heat Chocolate Fudge according to the directions on the bottle, and pour half of the bottle in a layer over the ice cream.  Add the remaining ice cream, hot fudge, and top with the Oreo cookie pieces. Freeze for at least 6-8 hours before serving. Serve with a scoop of whipped cream!


Read More http://www.kevinandamanda.com/recipes/dessert/peanut-butter-oreo-ice-cream-pie.html#ixzz1ro7SYWF4


Tiny last piece of the cake... trying to make it last! 


Tuesday, 10 April 2012

Pink Meringue Bites

Pink Meringue Bites - when you've got a bit leftover...


Hello meringue. 


I have enough of you to... do what? 


Certainly not enough left to cover those twelve cupcakes I see waiting in the back there. I could whip up a few more eggs and make this a party but I am feeling adventurous and ready to try something different. 


How about cute little Meringue Bites?


This literally took minutes to whip together (pun) and then they took 30 minutes in the oven (although I would be careful to check them at 20 minutes, especially if they are smaller than the ones I made). See here that they have been casually dropped onto a lightly buttered piece of parchment paper with cornflour sprinkled onto it. 


Why not regular flour? 


I do not know. 


My mom the Pavlova Princess (more to come on that one) said it makes all the difference.


Aka she has no idea either. 


Preheat the oven to 400 F and then, just as you are about to put these in, drop the heat to 250 F.


 Oh yeah - and I added some pink food dye too! Being Easter and all, I thought a little light pink fluff would fit in just perfectly among all the other too-cute-to-be-true things that happen this time of year.


Like this:


and this:


and definitely this, so sad it makes it cute puppy:


See! It's an excess of cuteness this time of year - and the desserts you eat should be no exception! 


I DO wish I had put more pink dye in the meringues. Lesson learned. But they have a pretty cute pink inside! 


Hm... makes me wonder how I could combine colours to make multicoloured meringues, and ones with surprise coloured insides. Seriously, they are so easy and satisfying to nibble on, it would be silly to just stop here. 


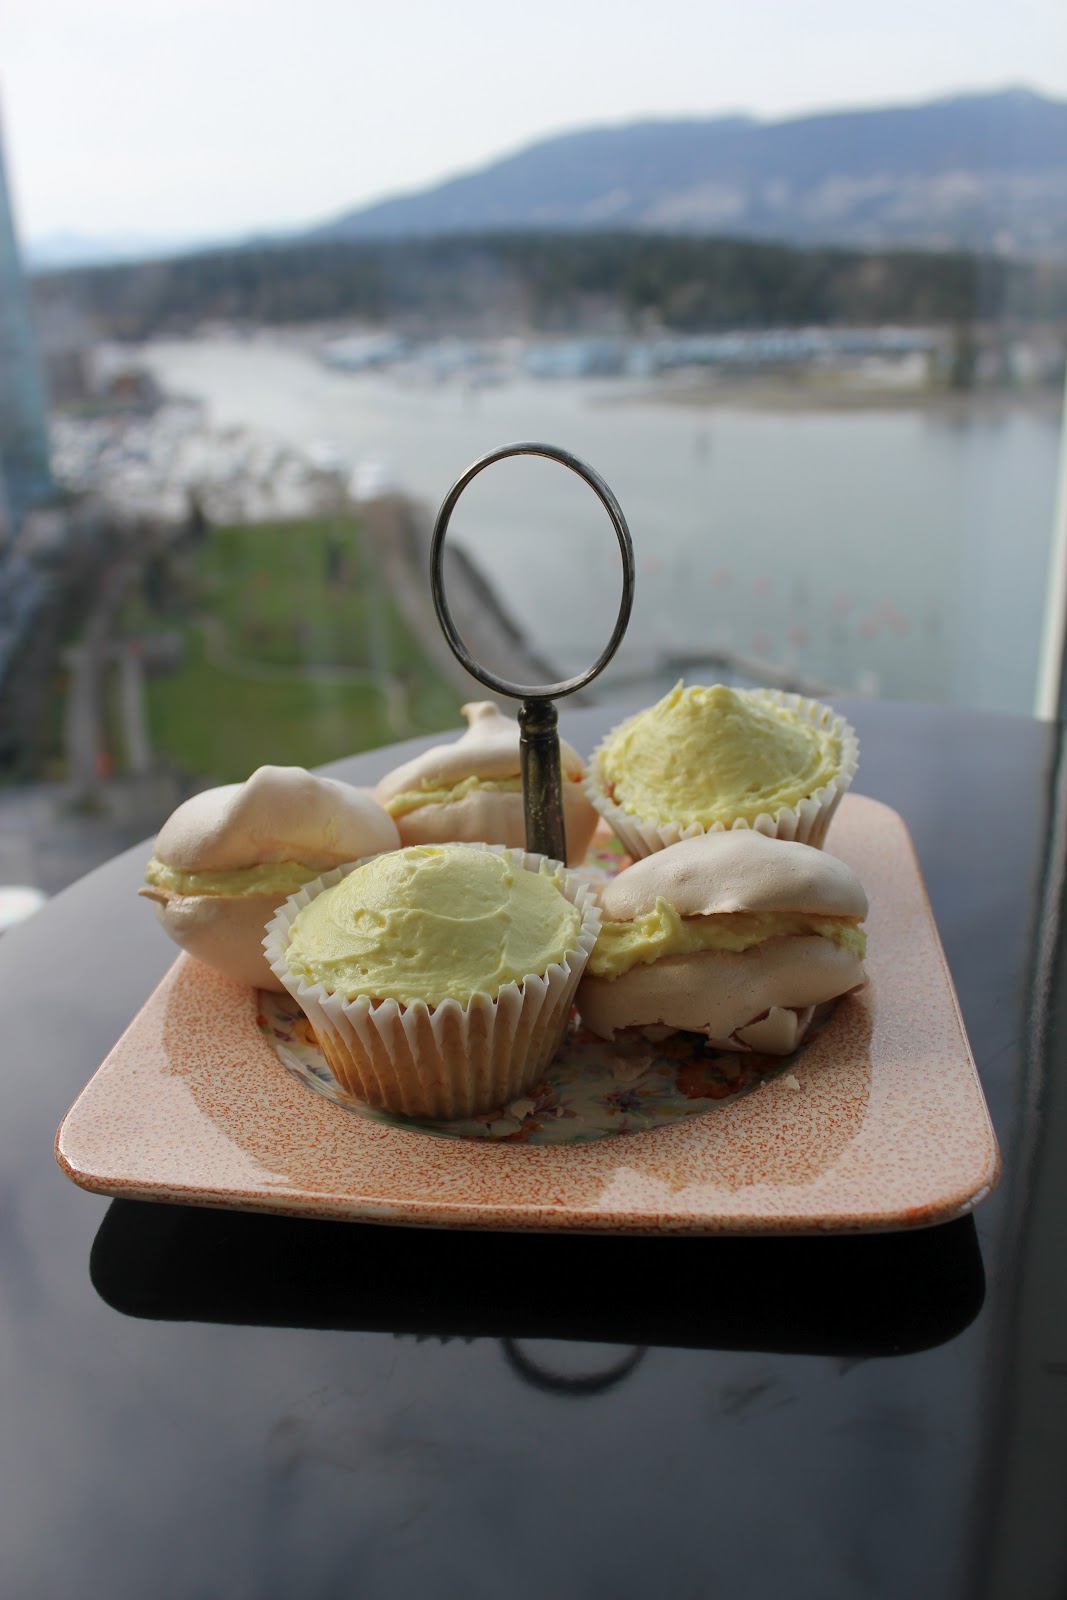
I used some of my left over yellow buttercream icing and made meringue sandwiches. 


Be careful: the icing is a lot heavier than the meringues (obvious) so be really careful when spreading not the break them (not to so obvious to me, apparently. Please don't make me tell you how many I shmooshed).


Paired with some of those delicious yellow-hued lemon cupcakes and you've got a perfect tea time treat for one. I mean, two. or four. 


Okay, maybe I ate all of those by myself. 


It's likely. 


*sigh*


Regardless... happy tea time! Or late night snack! or sinfully delicious breakfast!


Also, doesn't Vancouver make for a beautiful back drop?


Summer is coming!


And so is another ice cream cake.


and a pavlova. 


Stay tuned!