Sunday, 22 April 2012

Caramel Chocolate Chip Cookie Squares

I have to admit that this is a bit of a consolation recipe. 


Last week, I had HUGE aspirations of creating a beautiful union of chocolate cheesecake, caramel, and soft chocolate chip cookies in the most delightful and aesthetic of 1.5 by 1.5 inch squares.  Despite a thorough search on Pinterest, Google, AllRecipes, and even my most trusted baking blogs, I found no recipe to satisfy my growing desire to bake such a multitude of goodness in one pan. 


So I decided to make one up.


And, as often happens in such situations, my ambition exceeded my ability.


What resulted was an on-the-go, little bit of this, little bit of that, toss it in the oven and cross my fingers. 


aka. chocolate chip cookie base, caramel layer, chocolate cheesecake layer, caramel layer and then cookie bits crumbled on top (photo to the right), all of which took an infinite amount of time to bake and even then I wasn't sure I had done it properly, or thoroughly. 


Seriously. Constant checking. Constant indecision.


It tasted good though.


Or so I am told. 


I was so rattled by the challenge of cooking thoroughly through to the bottom of this massive square without burning the top (added a tin foil covering at some point) and my uncertainty of whether or not I had successfully cooked the cheesecake and trying to figure if it had "set" with those huge caramel layers keeping everything wiggly when hot...


It took me a few days to recover my cookie confidence! 


Required many naps and cuddles. And pictures of pugs. 


Alas, I am back. And determined, as always, although waveringly, to discover the best combination of treats possible.


However, I think I will stick to established recipes. 


For now.  


Chocolate Cheesecake Caramel Chocolate Chip Cookie bars, I will perfect you! And when I do, it will be fully documented on the blog. 


Embracing my inner Beyonce-like Baker. All sass. All confidence. 


This is what fearless looks like. 


And this dude, who is casually playing with a shark... :| 


and, almost, kind of like this:


baking the same thing that shook my confidence last week (minus the cheesecake, because I am a chicken) and it being awesome! 


Alright, still not quite fearless. But I'm getting there.  


Bring on the Caramel Chocolate Chip Cookie Squares!


This was the part of the recipe last week that I actually enjoyed. It serves as a fabulously basic chocolate chip cookie recipe, simple to whip up and one that is over-flowing with chocolate chips. Seriously. So many chocolate goodies. I found it through Pinterest and got the recipe at Two Peas and Their Pod. Nice site, right?


Recipe


Cookie:
2 1/8 cups all-purpose flour
1/2 teaspoon salt
1/2 teaspoon baking soda
12 tablespoons of butter
1 cup brown sugar
1/2 cup sugar
1 egg
1 egg yolk
2 teaspoons vanilla extract
2 cups chocolate chips (THIS IS A LOT and IT'S AMAZING)


Caramel:
1/4 cup sugar
1/4 cup brown sugar
2 tablespoons butter
1/3 cup whipping cream
*optional add: 10 - 15 individually wrapped caramel candy squares (unwrapped)


Pre-heat the oven to 325 F. I used a 9 x 12 pan, lightly buttered. 


Add flour, salt and baking soda together, whisking so that they are fully combined. 


In a separated bowl, mix melted butter and sugars until fully combined. This is easiest in an electric mixer. Add the egg, egg yolk, and vanilla extract. Mix until smooth and then add the dry ingredients, while mixing slowly. Once everything is just combined, stir in chocolate chips. Be careful not to over mix. 


Make the Caramel layer. Girl just can't get enough. As you may have noticed, I have used this fail-safe caramel more than once. Refer to my Caramel Brownie post to see a detailed how-to. 


The original recipe called for melting caramel candy squares with sweetened condensed milk. But I just can't stand the smell of hot condensed milk. I have made banofee pie and love it when it's cold but I just can't stand the smell when it's cooking - anyone else feel that way? 


I compromised by adding those caramel candies into my own mixture. I thought it might thicken it? I'm not sure it had much of an effect in that respect, but it certainly made more caramel over-all.


Do I need another reason to use them? It was obviously worth it. 


Press half of the cookie dough into your pan, covering it completely.


Remember how I said there were like a million chocolate chips in this recipe? 


I put some of them into their own layer. There were just far too many to reasonable fold into the dough, or so I thought. I could be wrong. But I usually forget those instances and instead blissfully like to believe that I am often... hmm, no, to be more accurately, I am always correct.  


And who doesn't want a chocolate chip layer? See, again, I am always right. 


Oh, and I also did 1 cup of big chocolate chips and 1 cup of minis in the whole recipe.  


It makes it 10 times better that way.


Next you add the caramel. All of it. Do not be shy. 


What?! Why the heck an I eating leaves?! 


Must. Refrain. From. Eating. Caramel. for now. 


Crumble cookie layer on top... while subtly licking caramel from every unnoticeable source. Okay, a few noticeable sources too. 


Toss that thing in the oven NOW so that you can take them out again in 30 minutes. 


aka eat them in 30 minutes. 


Although, you should perhaps wait a moment or two for them to cool down first. 


Okay, so you can eat them in 32 minutes. 

Second best to eating them is ogling photos of the finished product. ommm nommmm. 


Remember that chocolate chip layer? 


Well it wouldn't let you forget it even if you tried! 


There it is, literally shouting to get your attention. 


It says:


EAT ME.  


NOW, please.  


You oblige. Cannot resist chocolate oozing to surface. 


And if you manage to save some squares for later (I commend your self-restraint), they will even manage to look delectable while being stored right side up, sideways, and upside down in a cheap little tupperware! 

Impressive! 


Excuse me while I lick the oozing chocolate and caramel from my fingers. 


and from around my face. 


much like this. 


Monday, 16 April 2012

Decorated Cones

Decorated Cones 
- a little left over chocolate and a whole lot of sprinkles 


There isn't too much to say about these little guys, other than the fact that I had too much fun decorating them. 

Which is pretty obvious. 


Who doesn't love sprinkles? 

I dipped the cones in melted white chocolate and then sprinkled on a little colour. 

My sister got pretty excited when she saw these and it's definitely an activity we'll do again in the future. 


Someone once told me that these cones are made at paper mills... out of paper. I am not so sure how I feel about that. When it comes to store bought, I would rather have "paper" cones than the hard, too-easy-to-crack waffle cones. 

And dressing them up makes these cheap cones even more worthwhile.


Gotta say, the pink is my favourite. 

Kinda cute right? 


and ... LOL moment.  


Grasshopper Ice Cream

Grasshopper Ice Cream 
- for the love of mint... and brownies... and chocolate chips 


I have always loved mint ice cream. An unbelievable amount. 

My go to at the ice cream store? Always mint chocolate chip. And I love Marble Slab but they don't sell mint ice cream... so I stopped going there. 

You get the picture. 

So after making the Cookies and Cream ice cream (courtesy of the recipe that came with the mixer), I set out to make mint ice cream. Only I couldn't find a recipe online that I was confident in. 

So I spent an evening getting inspired at my local bookstore. Best evening ever! I plunked my baker butt down by the racks of baking books and had myself a little read. I came across a book which I already LOVE. It's called Scoop. And I don't think I have put it down since. 

Expect plenty more ice cream recipes from me.

And here is the first. 


Okay, second. But it's the first of the awesome ones. 


Remember those brownies that I so gracefully dropped? I found a use for them! 

Grasshopper ice cream is the perfection fusion - mint, brownies, and chocolate chips - and I set to making it right away. 

I was ambitious and tried to make this as homemade as possible. I found a recipe that seeped mint leaves for 30 minutes in the cream mixture to create the mint flavour. 

The process wasn't pretty. 

And it didn't make the mixture turn the colour I was hoping for either, so I played around with food colouring. 


After I'd strained out all of those mint leaves, of course. 

Here is what it looks like after colouring and cooling. 


Not bad! 

Now, the colour turned out nicely but the flavour was not what I was looking for - it was much too strong! Almost had a sharp taste too it, too. 

Then I realized that that was the peppermint in the Extract of Mint and Peppermint I accidentally used. 

Hmm, so that explains the ever so slightly detectable toothpaste taste. 

"You did what?!"

I know. I knowwww. 

I'm going to work on it. 

And purchase my ingredients a little more carefully next time.


But seriously, who sells a mint and peppermint combo? Not my fault. 

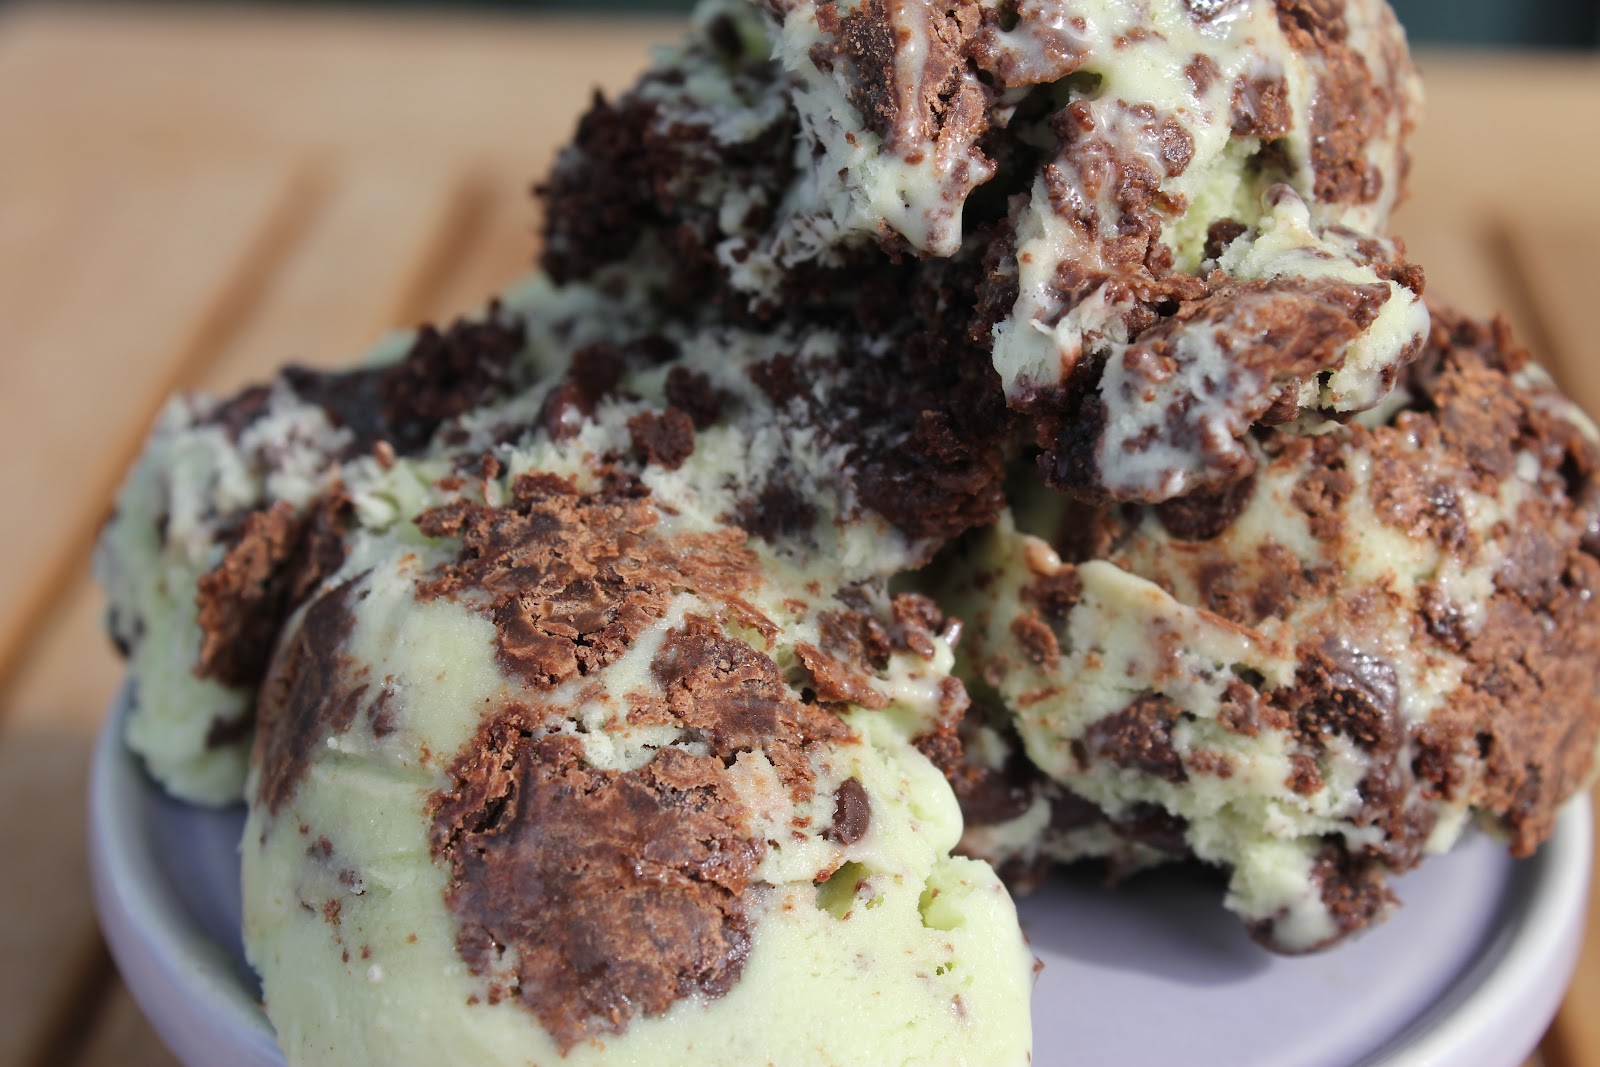
In the meantime, how beautiful did this ice cream turn out to be!


Recipe

1 cup whipping cream
2 cups whole milk
1/2 cup sugar
1/4 cup vanilla instant pudding mix
1/4 teaspoon salt
1/2 cup chopped fresh mint leaves
3 large egg yolks
1/2 teaspoon of mint and peppermint extract (oops!) 

Heat cream, milk, half of the sugar, vanilla pudding mix, and salt in a saucepan. Stir to dissolve the pudding mix. Bring to a simmer. Add chopped mint leaves and cover for 30 minutes, steeping for flavour. 

Strain cream mixture through a fine sieve. 

Beat egg yolks, the other half of the sugar, and mint (and peppermint) extract. Slowly add about 1/3 of the cream mixture to the eggs mixture. Return all contents to the saucepan. 

Add food colouring. I opted for 3 generous drops of green food dye. Although, add one at a time and use your own preference for colour. 

Put the saucepan on medium-low heat for 3-6 minutes. Ensure that the mixture does not come to a boil or the eggs will scramble. The mixture will be ready when it emits steam. 

Remove from heat. Put in a container, laying cellophane along the surface so that a thick layer doesn't form, and store in the fridge for a series of hours (ideally, over night) or in an ice bath for 30 minutes. 

Time for the fabulous mixer! After about 20 minutes of churning, add the brownies and chocolate chips. 

Store the ice cream in a freezer friendly container and let it sit for a few hours to harden up. 

Ta-da! 


Happy! 


Sunday, 15 April 2012

ANZAC Biscuits

ANZAC Biscuits - for my kiwi mommy


My mom made a baking request this weekend and, seeing as she is my most devoted blog follower, my most blindly-positive and over-encouraging taste tester, and my biggest, most committed fan, I couldn't really say no. 


So I was handed the New Zealand baking bible, a book so staple to a kiwi kitchen it is has been iconized in art and commemorated through history. 


Seriously, check it out. It's a big deal. 


And we've had this copy in our kitchen for as long as I can remember, and likely before then too. 


When I was a kid my mom said she would help me make anything from this cookbook that I wanted and, from a wide and comprehensive selection of succulents deserts to savoury meals, I chose mayonnaise. 


Don't ask my why. I was such a strange kid. And it ended up tasting horrible.


I was crushed. 


Anyway, this time I was directed to something much less peculiar. The cookies mom wanted are even more of a definition of Kiwi culture (arguably) than Edmond's cookbook: ANZAC Biscuits.


These cookies are Basic, with a capital B. They were created in 1915 for the purpose of sending to NZ and Aussie soldiers oversees. 


They contain no eggs or milk so they last forever and they are made with only a handful of ingredients, which made them ideal for the wartime ration periods. 


Since then a lot has changed, but these cookies have not! The recipe literally is the same thing. 


Simple, simple, simple.


If you haven't noticed, that isn't really my baking style!


No layers, no caramel, no sweet surprise hiding in the centre of this treat. But I wanted to make my mom happy so I set to work and, as expected, it wasn't really that much fun! 


Except for this part - the making a well in the flour/oats/coconut and pouring the butter in. 


Yup, that was kind of fun. 


But the good thing about these boring cookies is that there isn't anything that can go wrong. which is really good for me, because I have a tendency to make burn things, misread instructions, forget key steps, and forget the recipe and just do it freestyle.


Not the case with these cookies. I could not have forgotten something if I had tried to.


The result: the cookie ended up tasting just as my mom had hoped. 


Allllllriiiiight, so it was worth it. 


I would also like to point out that the recipe calls for rolled oats. My pony club knowledge tells me that what I put in was crushed oats. 


Do supermarkets even sell rolled oats?


Definitely war time stuff. 


And horse food. 


ANZAC Biscuit Recipe 
(a variation of the one from Edmund's)


1 cup flour
3/4 cup sugar
1 cup "rolled" oat
1 cup desiccated coconut
5 tablespoons butter
1 tablespoon Corn Syrup
1/2 teaspoon Baking Soda


Mix together flour, sugar, oats and coconut. 
Melt butter and corn syrup. 
Dissolved Baking Soda in 2 tablespoons of boiling water and add the melted butter and corn syrup. 
Make a well in the middle of the dry ingredients and add wet ingredients. Fold together and then spoon out onto a greased tray. 


Bake for 15 - 20 minutes at 350 F. 


And the day ends with a tin full of these classic biscuits and a happy mama. 


Not too bad. 


Saturday, 14 April 2012

Caramel Brownies

Caramel Brownies - oozing goodness, for goodness sake.  


So, I get brownies now. 


It was a revelation. Somewhere between the melting chocolate and the creation of decadent caramel, it dawned on me, a brilliant flash of understanding: brownies are awesome and, as long as I don't think about it too much, they're really easy too.  


And I can prove it. 


After my mega mess up last night when I literally tossed the brownie pan into the air and ended up with a major mess, my perfectionist self was nagging me to try it again. I wanted mouth watering squares that I could feed to my friends, not crumbs that I was able to squish into a medium tuperware (which has now become one big, oversized brownie cube). 


But, I didn't want to do the same recipe two days in a row *yawn*. Nope, time for something different. 


Something better. 


In comes a lovely book called Fabulous Brownies that I bought last summer for some much needed brownie inspiration. 


When I bought it last year, I successfully left out a cup of sugar in my first batch of inspired brownies and then overcooked my second batch. It was not so fabulous.


But I dusted off that book this morning  and determinedly chose the most delicious looking brownies I could.


I made a variation of the salted caramel swirl brownies, because following the recipe would simply be too easy, but also to fit the taste of my sister (most notably, no nuts!). 


The result, as you can see, was nothing short of amazing. And I am not even exaggerating. The homemade caramel is seeping out and the brownie itself is perfectly moist, perhaps even a slightly bit undercooked, which is how all brownies should be. 


Caramel Brownies
6 oz Bittersweet chocolate
2 oz Unsweetened chocolate


I am not really sure how much a difference there is between using those two chocolates, but I ran out of bittersweet chocolate and so topped it up with the unsweetened kind!


3/4 cups butter
1 cup sugar
4 eggs
1 teaspoon vanilla extract
1 cup flour
a pinch of salt 


Caramel swirl
1/4 cup sugar
1/4 cup brown sugar
2 tablespoons butter
1/3 cup whipping cream
1/2 teaspoon sea salt flakes


I have never made caramel before and so I was pretty excited to see it in the recipe. It's kind of like a chemistry lesson! I didn't know what to expect but I was ready to do some experimenting. 


First things first, put on your lab coat. 


Then add 2 tablespoons of water and the sugar into a sauce pan. On low heat, wait until the sugar is all dissolved.


 Once it is dissolved, boil the mixture and wait until it turns an amber colour. This is the science part! It took longer than I expected for the boiling sugar syrup to turn amber. But it started to happen, slowly, and I decided to just be patient, usually a good call.


Now, there is my amber colour! It's a lot thicker now too. I prepared my secondary ingredients in a bowl so that I could easily add them when it was time, which is now. Take your mixture off of the element and add your brown sugar, butter and cream. 


Once they are thoroughly mixed in, put the mixture back on the heat and boil it for about 5 minutes. It should start to thicken slightly and you'll know it's ready when it leaves a layer on the back of your spoon. When it's done, take it off the heat and start making your brownies. 


Like always, melt the chocolate and butter in a heat proof bowl over boiling water. Let it cool slightly after melting and then add it to the sugar, eggs and vanilla. This needs to be done slowly! Pour in some of the hot chocolate and whisk briskly. Adding only a bit in at first allows the eggs to adjust the heat properly. Next fold in your flour salt, then stir until mixed properly.


First you are a scientist, now an artist! 


Pour half of the batter into a prepared pan. Mine is 7x7 but that's only because it's all I've got. This would likely be better in a bigger pan, like an 9x9 inch. 


Next, be creative, and blot/draw/doodle/plop half of the caramel mixture on top. Don't forget the corner pieces, they like caramel too. 


Repeat. Brownie batter. caramel.


Here is where the true creativity shows - making the swirl! Drag a knife over the top of the brownie batter, hiding the caramel here, showing it there... creating temptation! 


then 25-30 minutes later, after cooking at 325F, they will look like this. Swirl is so worthwhile. 


Even this handsome man thinks so. 


Oh, yes. He does. 


They're down too. 


And you can just imagine how happy this guy would be if he got a plate of these brownies. 


Look at more funny looking dogs here. 


Or continue drooling over caramel brownies.